It’s the feast we wait for all year. If it’s your turn to host dinner this Thanksgiving, it’s time to prepare and organize. Dinner plans are best not left to the last minute. In fact, with careful preparation, you’ll be more relaxed and more likely to fully enjoy the day. Here’s a simple guide to easy and stress-free planning.

3 to 1 ½ weeks before – Start planning your menu and place your order if planning to serve a fresh turkey. If you’ll be purchasing a prepared turkey dinner, you should place your order 2 weeks in advance.

1 week before – Make a shopping list. Divide your list into two parts: 1) the things you need right away and 2) groceries that should be purchased last minute, such as perishable items.

five to four days before – Shop for groceries. Double check your list to make sure you have everything you need. If you’re cooking a frozen turkey, begin to thaw it. Defrosting in the refrigerator can take three to four days, depending on the size of the bird. A thawed turkey can keep in the refrigerator for two days.

three days before – If you’re using a fresh turkey, pick it up today.

two days before – Finish details. Pick up any rented items, last minute perishables and floral centerpieces. Select serving dishes and utensils, as well as set the table.

one day before – Prep, cover and refrigerate vegetables for side dishes. Prepare any dishes that can be made in advance and prep vegetables for side dishes; cover and refrigerate. Some drinks can be prepared ahead of time as well.

Thanksgiving – Early in the day, cook the turkey and any other dishes not already prepared. Finally, relax and enjoy the day!

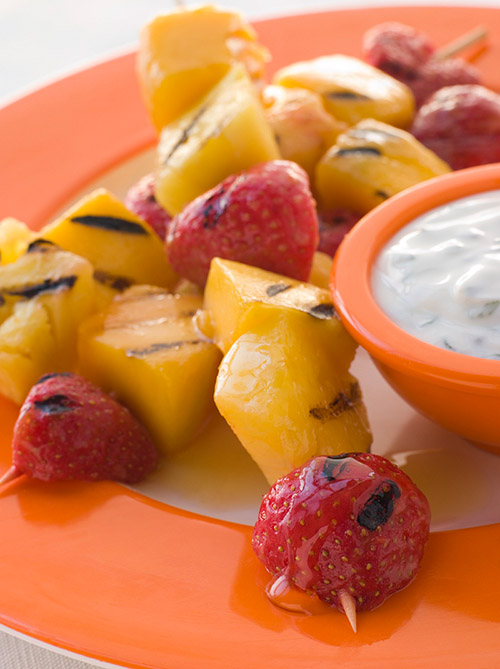
Delectable, easy to prepare and high on the “guest impress” factor, grilled fruit offers the magical taste of natural caramelized sugars for melt-in-your-mouth satisfaction. It makes the perfect dessert or summer salsa to serve over grilled chicken, pork or seafood.

Fruit is composed of mostly water and sugar – it’s the heat of grilling that reduces the water, concentrates the natural sugars and creates the divine sweetness of caramelization. However, these natural sugars can burn quickly, so it’s important to watch fruit closely on the grill.

Grilled Fruit

1. Choose Your Fruit — When choosing fruit for grilling, select firm but ripe pieces. Firmly textured fruits such as apples and pears tend to retain their structure during grilling. Softer fruits like plums, nectarines, melons and bananas – even grapes on their stem – will soften quickly. Leave the fruit unpeeled to help retain its shape while grilling. Most fruit can simply be washed, halved and pitted or cored. If you want to grill sliced fruit, it helps to use a hinged grill basket, perforated barbeque topper or place a sheet of nonstick aluminum foil directly on the grill. Fruit may also be threaded on bamboo skewers for kabobs to serve with a dipping sauce.

2. Prepare – All leftover grilling residue and drippings should be removed to ensure the best fruit flavor. When ready to grill, it helps to lightly brush fruit with a mild cooking oil or melted butter.

3. Grill Away — Grill fruit over medium direct heat just until fruit softens and browns slightly, turning once halfway through cooking. For a sugary-crisp coating, sprinkle brown or granulated sugar on the cut side of the fruit; let stand 10 minutes to allow the sugar to dissolve; grill fruit, cut side down, several minutes. If using a glaze, brush it on fruit near the end of cooking so the sugars don’t burn.

4. Experiment — Sliced pineapple and halved stone fruits such as peaches, nectarines, plums, pluots and apricots are perfect candidates for grilling, but branch out and try some unexpected fruits on the grill. Cut unpeeled mango lengthwise along the seed, then grill, cut side down. Scoop fruit from peel to serve. Place peeled bananas or a small bunch of seedless grapes on their stems directly on the grill and cook just until they soften slightly, about four to five minutes. Sliced honeydew and cantaloupe melons are also great options for the grill. They can be cooked with or without their rind intact.

Barbecue is as American as “mom and apple pie”, but have no doubt, there are fierce opinions about which region serves the best barbecue. Geography plays an important factor in determining how we come to favor certain sauces (sweet, spicy or tangy); how it’s cooked (over wood or charcoal in pits or on spits); and whether it’s served with a bun or plain white bread. Regional variations all have distinct flavor and meat preferences, with recipes as vast as the Texas landscape.

Texas-style barbecue is for the cowboy in the crowd. Chicken, sausage and pork all take a back seat to beef brisket. Basic seasonings like salt and pepper with a sprinkle of cayenne are the norm. The sauce is a mixture of ketchup, vinegar and meat drippings, usually served on the side in a plastic squeeze bottle. The whole meal is served up on butcher paper with a cup of beans and white bread.

Memphis barbecue features pulled pork sandwiches and ribs. The pork sandwich is made from the pork shoulder that is slow roasted over charcoal, served either with pulled white meat, the chopped crispy outer pieces or a combination of the two. All of this is piled on a hamburger bun and topped with slaw. Ribs in any form are often mopped with a medium-bodied, tangy, tomato-based sauce and a layer of dry rub on top.

North Carolina barbecue features pork. The Western part of the state prefers pork shoulder, while the Eastern half likes to roast the whole hog! The pork is cooked over wood or charcoal and chopped or shredded, guaranteeing the maximum absorption of the thin vinegar and hot pepper-based sauce.

St. Louis barbecue uses a special rib cut – spareribs with the brisket bone removed, but more often it’s the “pork steak” that distinguishes the St. Louis style. One method of preparing “pork steaks” is to slowly grill until done, then simmer in a pan of sweet-tangy sauce. The result is a tender steak full of flavor. Baked beans, grilled sweet corn and cole slaw complete the menu.

Leftover barbecue is always welcomed as a quick meal. Store any leftovers in the refrigerator up to three days. Leftover pulled pork freezes quite well; store in a zip-tight plastic bag for two to three months. Thaw in the refrigerator, remove from plastic and place in oven-safe pan. Cover and reheat at 250°F until heated through and the internal temperature reaches 165°F.

It’s peak grilling season, and if you’re like us, you’re trying to find ways to cook nearly every meal over open flames. And if you’re lucky enough to have a smoker out on the patio, you know how that smoky aroma can elevate just about any dish. If you aren’t, don’t despair.  Thanks to the wonderful world wide web, you can channel your inner MacGyver and craft your own smoker. We’ve scoured the ‘net and found four comprehensive step-by-step instructions that range from flowerpots to a cinder block smoke cave.

Check each of these out and choose one that fits your needs and space. We’re listing them in order of size. If you do flex your inner handyman skills, do let us know how it goes!

  • The ever-popular trash can smoker, one of the original DIY smokers that uses little more than a steel drum trash can and a “fire basket.”

Be forewarned that, regardless of the version you choose to craft, these are serious projects. We suggest reading instructions thoroughly and making sure you have the requisite materials and tools before you get started. Once constructed properly, we’re sure that the amazing smoked flavor will be worth the effort!

Picnic Planning

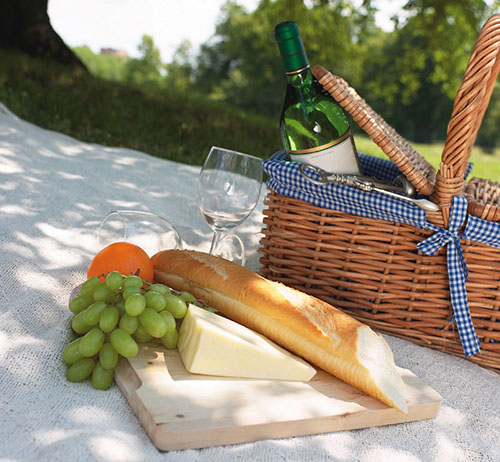
Today is International Picnic Day, and there’s really only one way to celebrate, and that’s to enjoy a meal al fresco.  Here are a few tips to make sure you’re ready with a properly packed picnic basket.

  • Plan ahead to make sure foods and beverages are kept at the appropriate temperatures and use insulated containers where necessary.
  • Keep it simple with casual food that require minimal utensils, and pack with light, resealable and stackable containers. Think fruit, sandwiches, pastries and other finger-friendly food.
  • Don’t forget about cleaning up with convenient pre-moistened towelettes or anti-bacterial gel, and also a trash bag for disposables.
  • Track down a sturdy box or canvas tote with handles if you don’t have a picnic basket for your mobile meal.
  • Consider how long you’ll be out, since foods can go bad. Just remember the two-hour rule…prepared food shouldn’t be left unrefrigerated for more than two hours (one if it’s hotter than 90°).

With just a bit of planning, a big blanket, and perhaps some wine (if you’re of legal imbibing age, of course), you’ll be ready for a lovely outdoor meal. Happy International Picnic Day!

Three Ways to Cook Asparagus
It’s always an exciting time of year for cooks when Michigan asparagus comes in after so many months without local fresh vegetables. Asparagus is a favorite simply steamed or grilled as a side to meat or fish, but towards the end of the season when we’ve eaten it multiple times a week, we start to look for new ways to cook it so we don’t get bored.

If you want to keep things simple (or if the weather is not good for grilling), roast asparagus in a hot oven. Wash and trim the asparagus, coat it lightly with olive oil and a little salt, and roast it on a baking sheet or in a 13 x 9-inch baking dish at 450° until they are done to your liking (cook times will vary depending on the thickness of the asparagus; typically 8 to 15 minutes). Pull them sooner if you prefer an al dente texture; if left longer, the vegetable will caramelize and the tips become deliciously crisp. Shake the pan halfway through cooking to rotate the spears. For a fancier dish, allow asparagus to cool slightly, and wrap in very thin slices of ham or prosciutto. Run under the broiler for a couple minutes to crisp the prosciutto.

In addition to ham, it’s well known that asparagus has an affinity with eggs – it finds its way into many a quiche and omelet, and people often pair it with egg-based Hollandaise sauce or aioli/mayonnaise. But another delicious, less common pairing is asparagus with shellfish, such as shrimp or scallops. They both have a slight sweetness that complements the other, like in this scallop and asparagus stir fry, or this risotto bowl square
shrimp and asparagus risotto.
We even had a dish in a Spanish restaurant recently that was a simple scramble of asparagus, ham and eggs, topped with grilled shrimp… a fabulous combination that takes just minutes to prepare!

If you don’t want to cook your asparagus at all, you don’t have to –with the help of a vegetable peeler, asparagus can be transformed into long, thin strips and eaten as a salad. The dressing combinations are endless, but we prefer lighter vinaigrette-style dressings, since the shaved asparagus is delicate. This recipe, which combines the shaved asparagus with pistachios, ricotta salata and a light lemon dressing, details the technique for shaving the vegetable into strips.

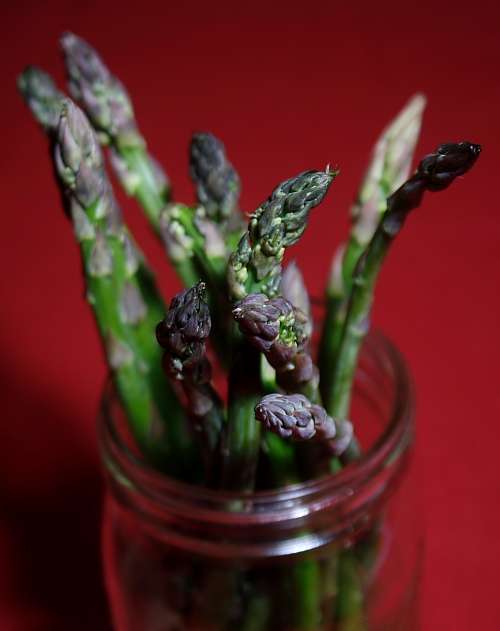
When shopping for asparagus, always look for three things: the tips should be tightly closed, the stalks should not have any vertical lines (indicating the vegetable has shriveled), and ideally the bottoms should have been kept moist. Use asparagus as soon as possible after purchasing; if you can’t use it the same day, trim the bottoms and stand the asparagus upright in a little water in the refrigerator (a wide vase or Mason jar works well).

Although asparagus is available year-round from Mexico or South America, its flavor is incomparable when just picked, so make sure to enjoy Michigan asparagus to its fullest while the season lasts!

Stocking Bar Essentials at Home

We give a lot of credit to Mad Men for resurrecting the appreciation for a stiff, well-crafted cocktail, and with the highly-anticipated return of the series on March 25, here are a few considerations for stocking a home bar. This way, you’ll be ready with a strong drink in hand for the duration of the two-hour premiere.

  • Many experts will suggest stocking versatile variations of essential liquors – vodka, gin, bourbon and the like. This is a sound approach if you truly enjoy each of these spirits equally, or if you plan on hosting a shindig where you’ll need to cater to varied tastes. However, your home bar exists first and foremost for the homeowner… you. Your bar stock should reflect your drink preferences and intentions. Consider the types of drinks you’ll likely be enjoying most – this should be the cornerstone of your stocking plan.
  • Take a good look at your bar space and budget. Most of us don’t have an expansive space to stock dozens of bottles, so selecting the right ones to keep on hand can be tricky. Much like stocking a refrigerator, thought should be given to planning out which spirits deserve a place in your limited space. And even if you’re buying mid to bottom shelf spirits, the cost of cocktail essentials will add up quickly. Proper planning can at least help set the expectation in terms of wallet damage.
  • Once you’ve figured out your primary cocktail selections, it’s time to think about complementing liqueurs. The variety and price of these additional ingredients run the gamut, so versatility is key. And choices like dry vermouth and bitters are used in such scant amounts that they’ll last you some time. This is a double-edged sword – you’re getting value from extended use, but you’re also taking up precious shelf space.
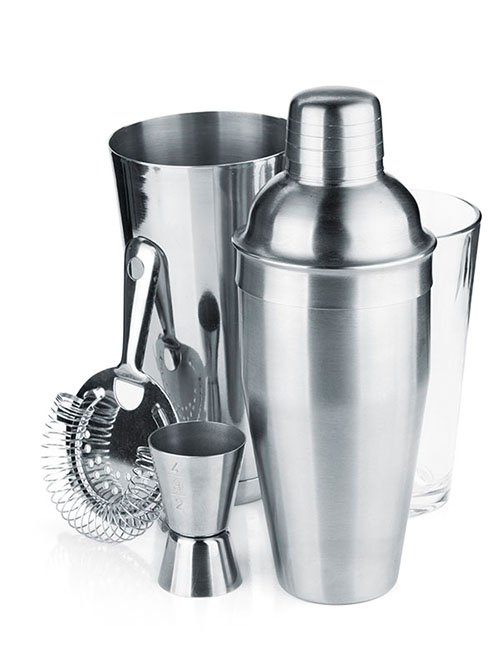
  • Don’t forget the need for a few basic bar tools: a jigger for proper measurements, a shaker and mixing glass for shaking and stirring, a Hawthorne strainer, a long-handled bar spoon, and a thick, sturdy muddler for maximum crushing power. Many stores offer these essentials in budget-friendly sets, but if you’re serious about your cocktails, consider the purchase of durable and versatile bar tools an investment that will hopefully pay off in (drink) dividends.

These are just a few general thoughts for a beginner’s home bar. Explore a few local cocktail bars like The Sugar House or Alley Bar and try a few new cocktails for inspiration. Just make sure you get your ducks in a row before the show starts!

Meyer lemons- those deep yellow-orange lemons with glossy, thin skins and a floral fragrance – are loved by cooks and foodies for their juiciness and sweet, complex flavor. Perhaps you’ve seen them in stores but were unsure what to do with them? We’re nearing the end of Meyer lemon season (December through April), so if you haven’t yet tried them, don’t miss out! Here are five simple uses for the fruit that will have you eagerly awaiting next year’s crop.

Salad dressing

Because they’re less astringent than Eurekas, Meyer lemons make an especially nice salad dressing. Whisk together equal parts Meyer lemon juice and olive oil; add sea salt and freshly ground pepper to taste. Any fresh herbs you have on hand would be a nice addition. Use to dress a simple green salad, steamed vegetables or even fish.

Candied lemon slices

Meyers work great for candying or making marmalades because they have less bitter white pith. To make candied lemon rounds, thinly slice 6 lemons, removing any seeds. Simmer the slices in 3 cups water and 3 cups sugar until soft and translucent, 30-40 minutes. Store in the refrigerator in their syrup.

Lemon syrup for lemonade or cocktails

If you make the candied lemons above, the leftover syrup can be used to make lemonade. Use a ratio of 1 part syrup to 1 part lemon juice to 3 parts cold water for a sweet lemonade; add more straight lemon juice if you prefer more pucker. You can also make lemon-flavored syrup by warming equal amounts of sugar and water and adding zest to the syrup (use the zest of one lemon for every cup of water).  Bring to a simmer, remove from heat and let stand for 15 minutes to infuse the flavors, then strain. Keep refrigerated. The flavored syrup is also delicious in cocktails.

Meyer lemon ice

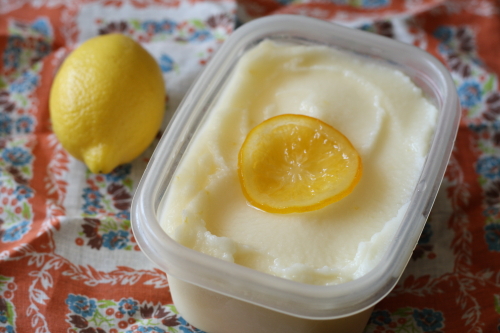
Who doesn’t love the refreshingly tart flavor of a good lemon ice? Here’s a basic recipe that can easily be doubled: Combine 1 cup sugar, 1 cup water and the zest of one lemon; warm in microwave or on stovetop just enough to dissolve the sugar. Cool, add 1 cup Meyer lemon juice, and freeze for 4 hours, stirring with a fork every 30 minutes to prevent the mixture from freezing solid. If you’ve already made lemon syrup, you can substitute that for the sugar and water. Meyer lemon ice

Salt-cured lemons

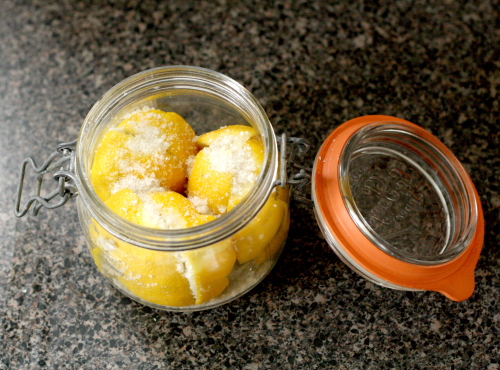
Salt-cured lemons, or preserved lemons, are a specialty of Moroccan cooking. Salt transforms the lemons, softening the peel, which can be chopped and added to dishes. Meyer lemons work especially well, as their thinner skins cure faster. They can be used anywhere you would use lemon and salt in a dish, or can stand in for olives. We like to add them to grated carrot salads, sautéed greens, and braised chicken dishes, or make a gremolata of chopped parsley, finely diced preserved lemon peel and a little olive oil to use on vegetables or fish. The brine is an excellent addition to a Bloody Mary. Here is a preserved lemon recipe that uses Meyer lemons.
salt cured lemons