How to Grill Fruit

Delectable, easy to prepare and high on the “guest impress” factor, grilled fruit offers the magical taste of natural caramelized sugars for melt-in-your-mouth satisfaction. It makes the perfect dessert or summer salsa to serve over grilled chicken, pork or seafood.

Fruit is composed of mostly water and sugar – it’s the heat of grilling that reduces the water, concentrates the natural sugars and creates the divine sweetness of caramelization. However, these natural sugars can burn quickly, so it’s important to watch fruit closely on the grill.

Grilled Fruit

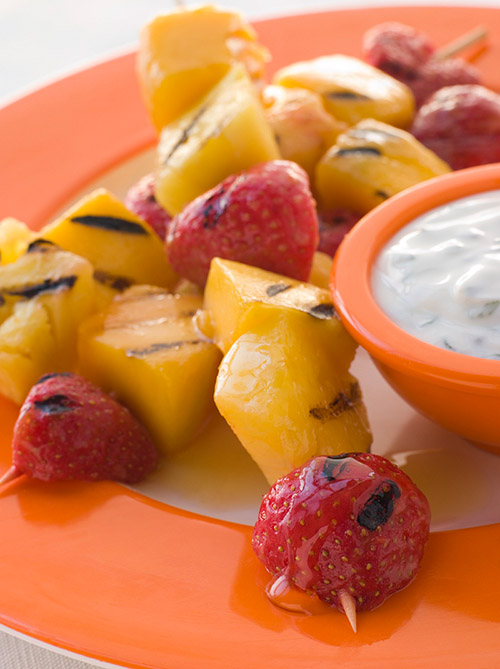
1. Choose Your Fruit — When choosing fruit for grilling, select firm but ripe pieces. Firmly textured fruits such as apples and pears tend to retain their structure during grilling. Softer fruits like plums, nectarines, melons and bananas – even grapes on their stem – will soften quickly. Leave the fruit unpeeled to help retain its shape while grilling. Most fruit can simply be washed, halved and pitted or cored. If you want to grill sliced fruit, it helps to use a hinged grill basket, perforated barbeque topper or place a sheet of nonstick aluminum foil directly on the grill. Fruit may also be threaded on bamboo skewers for kabobs to serve with a dipping sauce.

2. Prepare – All leftover grilling residue and drippings should be removed to ensure the best fruit flavor. When ready to grill, it helps to lightly brush fruit with a mild cooking oil or melted butter.

3. Grill Away — Grill fruit over medium direct heat just until fruit softens and browns slightly, turning once halfway through cooking. For a sugary-crisp coating, sprinkle brown or granulated sugar on the cut side of the fruit; let stand 10 minutes to allow the sugar to dissolve; grill fruit, cut side down, several minutes. If using a glaze, brush it on fruit near the end of cooking so the sugars don’t burn.

4. Experiment — Sliced pineapple and halved stone fruits such as peaches, nectarines, plums, pluots and apricots are perfect candidates for grilling, but branch out and try some unexpected fruits on the grill. Cut unpeeled mango lengthwise along the seed, then grill, cut side down. Scoop fruit from peel to serve. Place peeled bananas or a small bunch of seedless grapes on their stems directly on the grill and cook just until they soften slightly, about four to five minutes. Sliced honeydew and cantaloupe melons are also great options for the grill. They can be cooked with or without their rind intact.

Spicy Mediterranean Pizzas

Spicy Mediterranean Pizzas

We spent some quality time at our backyard grill and whipped up some quick and easy individual pizzas. These pizzas are a fun way to serve up a fast dinner, and they allow each diner to individualize their pie to their own taste. Here’s what we used to make ours, but have fun with it and experiment with different toppings and herbs and spices!

Pick Your Crust
We used Stonefire Whole Grain Naan Bread. You could also use other flavors of naan bread, pitas or tortillas.

Make The Sauc
We combined 1 (8 oz.) can Full Circle organic tomato sauce, 1 Tbsp. Trader Joe’s tomato paste, a drizzle of Trader Joe’s extra virgin olive oil, a squirt of organic agave nectar, 1 packet Splenda and a few pinches of sea salt. You can personalize your sauce by using different sweeteners such as regular sugar or honey, or spice it up with some red pepper flakes!

Get Grillin’
We topped our pizzas with Boar’s Head feta cheese, Italian cheese blend, Trader Joe’s sliced black olives, Boar’s Head Turkey Pepperoni, and a teaspoon each of Lighthouse freeze-dried Italian herb blend, red onions and jalapeños. Here’s where each diner can really personalize their pie by making it spicier by adding more jalapeños, or choosing a different meat or cheese.

Choose Some Toppings
This part is simple – just throw them on the grill over indirect heat until the cheese is melted and the edges of the Naan bread get crisp. Serve immediately, but don’t burn your mouth on all the hot melted cheese!

Chef Tip
While this recipe is perfect for a quick weeknight meal, it’s also great for family get-togethers and backyard barbecues with friends. Everybody will have a great time getting to assemble their own pizza, and the grilling couldn’t be easier!

Makeshift Smokers for Summer Grilling!

It’s peak grilling season, and if you’re like us, you’re trying to find ways to cook nearly every meal over open flames. And if you’re lucky enough to have a smoker out on the patio, you know how that smoky aroma can elevate just about any dish. If you aren’t, don’t despair.  Thanks to the wonderful world wide web, you can channel your inner MacGyver and craft your own smoker. We’ve scoured the ‘net and found four comprehensive step-by-step instructions that range from flowerpots to a cinder block smoke cave.

Check each of these out and choose one that fits your needs and space. We’re listing them in order of size. If you do flex your inner handyman skills, do let us know how it goes!

  • The ever-popular trash can smoker, one of the original DIY smokers that uses little more than a steel drum trash can and a “fire basket.”

Be forewarned that, regardless of the version you choose to craft, these are serious projects. We suggest reading instructions thoroughly and making sure you have the requisite materials and tools before you get started. Once constructed properly, we’re sure that the amazing smoked flavor will be worth the effort!